Open the 2Respond Creator and click on the ![]() button at the bottom.
button at the bottom.
Step 1 - Sender and Icon
Sender
Children will see this character as the person sending them emails.
Every email will be from the same character.
There are some example senders, to use one of these, click the character and then the 'Select Character' button.
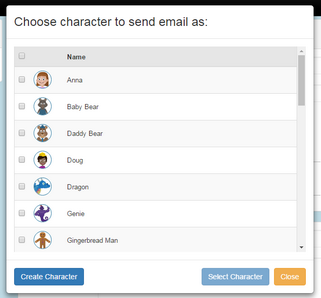
Alternatively, create a character by clicking on the 'Create Character' button and creating a character by selecting clip art, uploading an image from the device or by drawing an image using the paint tools.
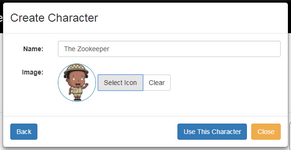
Enter a Name for the character and click on the Select Icon button. This opens the same Clip-art picker screen. From here either:
| • | Use the drop-down box to select an appropriate clip art category and then an appropriate image. |
| • | Click the |
| • | Click the |
Click on the 'Create and Use this character' button to finish.
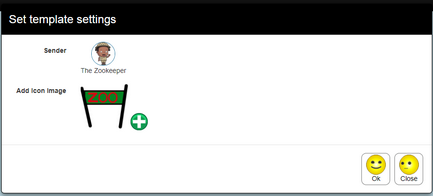
Icon
This selects the icon that the children will see in their 2Dos. There are a few options for the icon. When the button is clicked, the Clip-art picker screen will open. From here, either:
| • | Use the drop-down box to select an appropriate clip art category and then an appropriate image |
| • | Click the |
| • | Click the |
The image will appear as an icon on the screen next to the 'Add Icon Image' title.
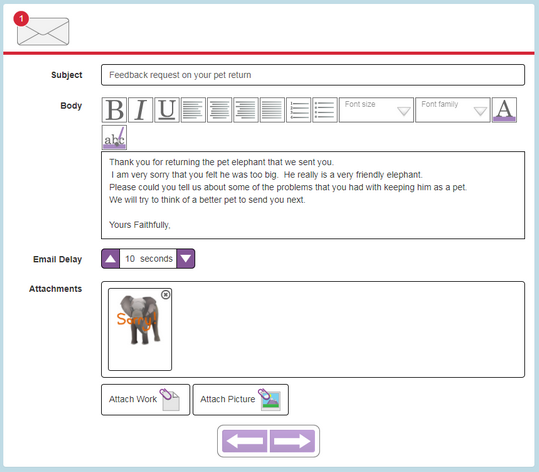
Step 2 - The first email in the chain
Complete the following details in the appropriate boxes in order to create the first email in the chain. The envelope icon with the red number 1 indicates that this is the first email.
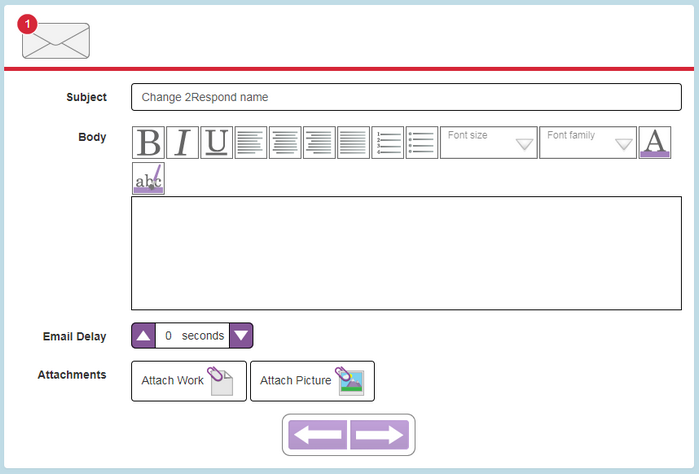
| • | Subject - Choose an appropriate subject line for the email. This will appear to the child in the Subject box. |
| • | Body - This is the main content of the message. |
| • | Email Delay: When the children sends a response to this email the email delay is the number of seconds that should pass before the second email of the activity will be sent back to the child. This simulates the time taken for the person sending the email to respond. Which makes the child feel more like they are getting a genuine response. |
| • | Attachments: Add attachments to the email. |
Click on the 'Attach work' button to attach a file that has been created in Purple Mash and is saved in a Purple Mash folder.
Click on the 'Attach Picture' button to attach a picture. This can be a drawing, clip-art or a picture uploaded from the device.
Click on the small grey cross that appears in the top right hand corner of the attachment image to remove any attachment..
Step 3 - Saving
Click on the  button. The Custom 2Respond can then be set as a 2Do for children. See Setting 2Responds for children.
Re-save once all the subsequent emails are added to the email thread.
Step 4 - Adding another email to the chain
To add an email to the chain, click on the position in the chain before the new email. Click on the ![]() button on the area of the screen called Email Thread.
button on the area of the screen called Email Thread.
This will create a duplicate of the highlighted email without a Body message or attachments ready to edit.
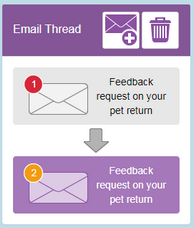
Check that the correct email is selected; look for the icon ![]() at the top of the email and then add the required details like the first email.
at the top of the email and then add the required details like the first email.
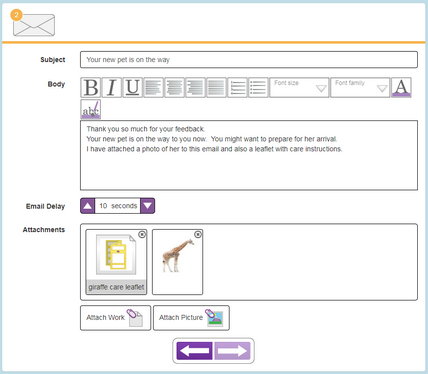
Save again.
Now add further messages to the activity in the same way.
Click the Save button to save any changes.